Sending to a Registered WebDAV Server
Procedure

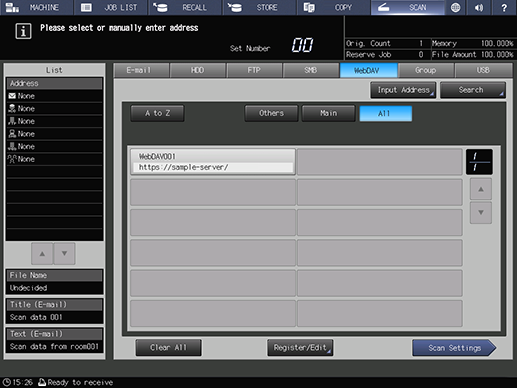
[E-mail] is selected by default. For details about the default display for the [SCAN] screen, refer to [Default Address].


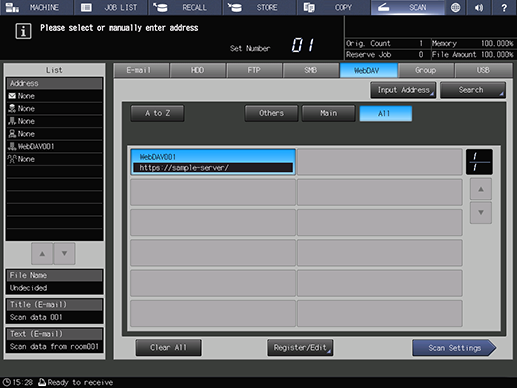
The selected destination appears in [List] on the left side of the screen.
To deselect the destination, press the selected register name again.
The search feature allows you to search for destinations. For details about search, refer to Searching Destinations.
Use [A to Z], [Others], or [Main] to filter the register names.
Press [Input Address] to manually enter the destination. For details about entering a destination, refer to Sending to an Unregistered WebDAV Server.

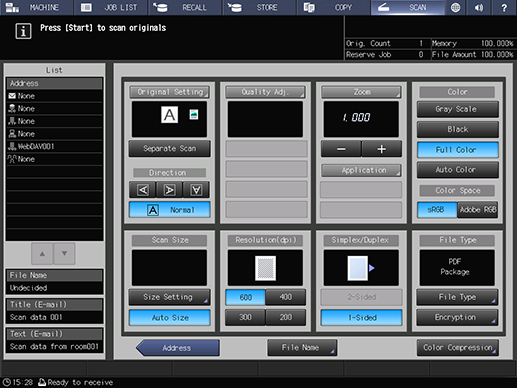
The [Scan Settings] screen is displayed.

For details about the scan conditions, refer to [Scan Settings].

Scanning begins and the scan data is sent to the selected destination.
Press [Address] to return to the [SCAN] screen.
The destination or [Scan Settings] screen settings may not be deselected even after sending. It is recommended that you deselect settings and the destination once the operation is finished. On the [Scan Settings] screen, press Reset on the Control panel to deselect the settings. You can also deselect the destination by pressing [Clear All] on the [SCAN] screen, or by pressing Reset on the Control panel.
 in the upper-right of a page, it turns into
  and is registered as a bookmark.