

Loading Paper Into Large Capacity Unit LU-202m/Large Capacity Unit LU-202XLm
Overview
Load envelopes into the Large Capacity Unit LU-202m/Large Capacity Unit LU-202XLm.
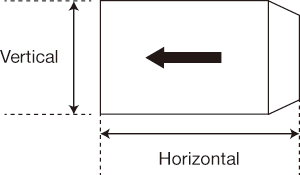
- Available size
Widthwise 100 mm to 245 mm, lengthwise 148 mm to 375 mm / Widthwise 3.94" to 9.65", lengthwise 5.83" to 14.76"
- Recommended sizes
Standard | Size | Widthwise | Lengthwise |
|---|---|---|---|
Domestic standard | Square 2 | 240 mm / 9.45" | 332 mm / 13.07" |
Long 3 | 120 mm / 4.72" | 235 mm / 9.25" | |
Long 4 | 90 mm / 3.54" | 205 mm / 8.07" | |
North America standard | 6 e 9 1/2 | 241 mm / 9.49" | 152 mm / 5.98" |
ISO standard | C5 | 229 mm / 9.02" | 162 mm / 6.38" |
C6/C5 | 229 mm / 9.02" | 114 mm / 4.49"* |
*: Length of 148 mm / 5.83" or longer with open flaps.
- Load capacity
100 sheets (50 sheets for Square 0 and Square 1 envelopes)
Height difference of envelope top surface at 10 mm / 0.39" or less.
- Envelope with film window
- Envelope with double-sided tape and release paper on the flap
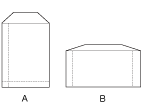
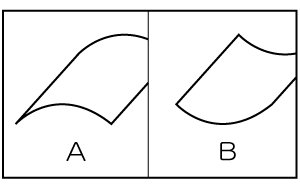
- It is recommended that you use one side seam (A) or double side seam (B) envelopes. If the sticking tab overlaps the print side, print output may be faded.
- The description in this section uses Large Capacity Unit LU-202m as an example.
Procedure (For Square 2 Envelope)
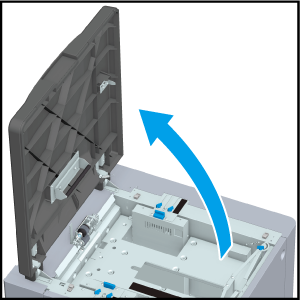
The Tray bottom plate goes down.
- If the machine is not turned on, the Tray bottom plate will not go down. Turn the Sub power switch on. For details, refer to Switch on Power Supply of the System.

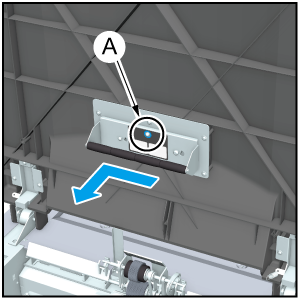

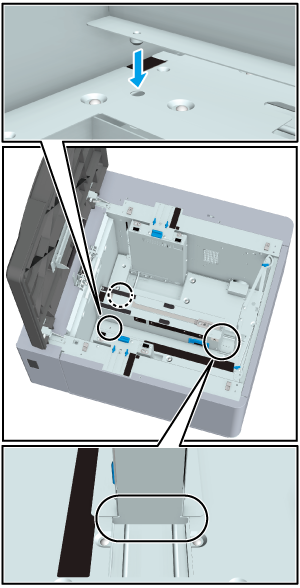
Install the detent part of the Bottom auxiliary guide by aligning it with the groove of the Tray bottom plate.

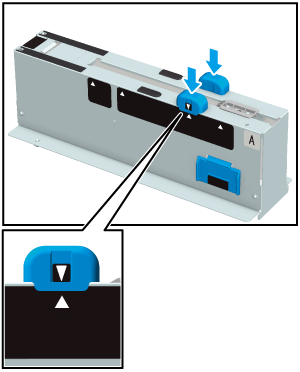
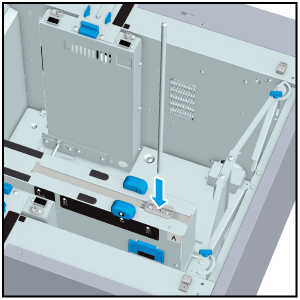
Align the , mark of the Rear lifting part with the + mark of the Bottom auxiliary guide.


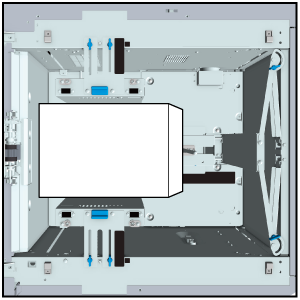
Load the open envelopes against the left side of the tray so that the open flaps are on the right side.
When loading, bend envelopes so that they do not hang down.

If an error occurs when a few envelopes with a weight of 80 g/m2 / 21 lb Bond or less is loaded, perform the following procedure.
- 1. Remove the Front lifting part from the side of the Bottom auxiliary guide.
- 2. Attach the Front lifting part all the way into the Bottom auxiliary guide.
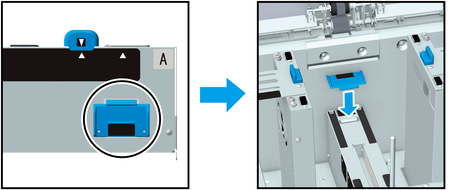
Procedure (For Long 4 or 3 Envelope)

The Tray bottom plate goes down.
- If the machine is not turned on, the Tray bottom plate will not go down. Turn the Sub power switch on. For details, refer to Switch on Power Supply of the System.

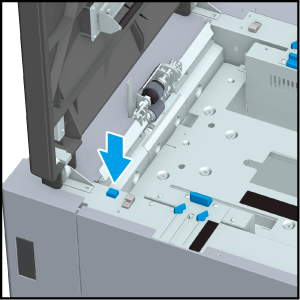

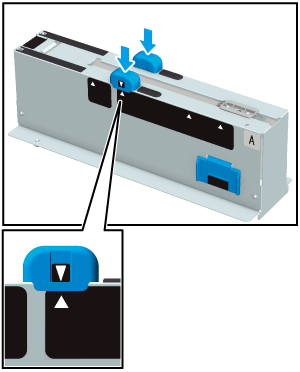
Align the , mark of the Rear lifting part with the + mark of the Bottom auxiliary guide.

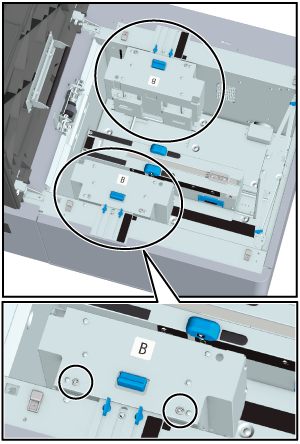
Install it so that the installation holes of the Side auxiliary guide fit with the positioning screws of the Side guides.
- Install the Tray bottom plate so that it is in the lowest position.

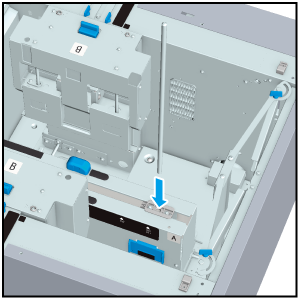

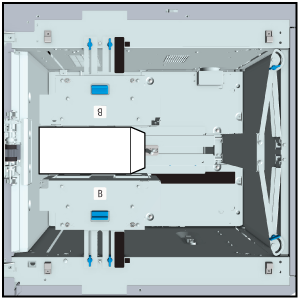
Load the open envelopes against the left side of the tray so that the open flaps are on the right side.

Procedure (For Square 1 or 0 Envelope)
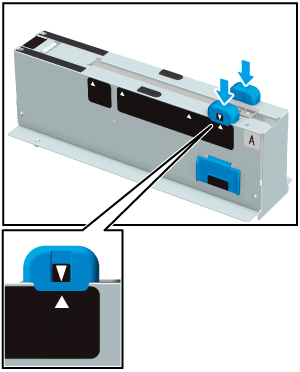
Align the , mark of the Rear lifting part with the + mark of the Bottom auxiliary guide.

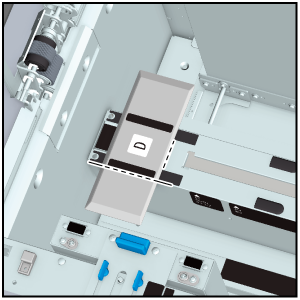
Align and attach the Bottom auxiliary plate to the marking line of the Bottom auxiliary guide, and the edge of the PET sheet of the Bottom auxiliary plate to the edge of the Bottom auxiliary guide.

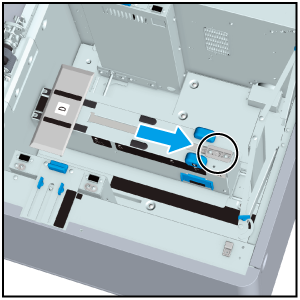
Remove the Rear guide shaft if it is attached.

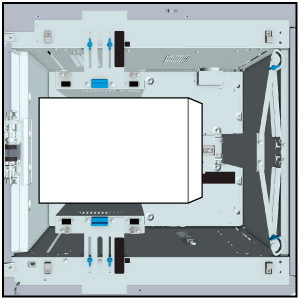
Load the open envelopes against the left side of the tray so that the open flaps are on the right side.
When loading, bend envelopes so that they do not hang down.

Procedure (For C5, C6/C5, or 6 x 9 1/2 Envelope)
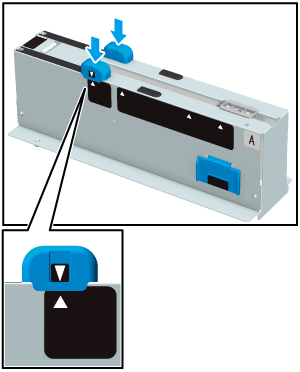
Align the , mark of the Rear lifting part with the + mark of the Bottom auxiliary guide.

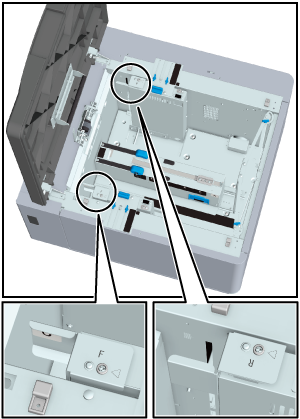
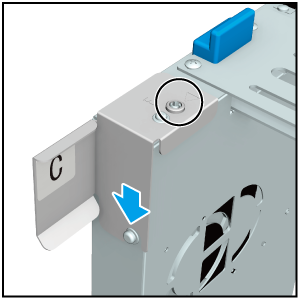
Mate the hole of the Tip auxiliary guide with the positioning pin of the Side guides.
Mate the notch of the Tip auxiliary guide with the positioning collar of the Side guides.


Align and attach the Bottom auxiliary plate to the marking line of the Bottom auxiliary guide, and the edge of the PET sheet of the Bottom auxiliary plate to the edge of the Bottom auxiliary guide.
Depending on the direction of the curl of the envelopes, feeding performance may be improved by not installing the Bottom auxiliary plate. For details, contact your service representative.

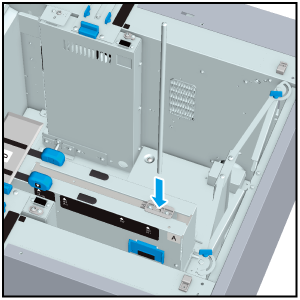

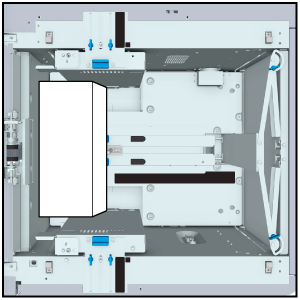
Load the open envelopes against the left side of the tray so that the open flaps are on the right side.


 in the upper-right of a page, it turns into
  and is registered as a bookmark.