
Easy Installation of Printer Drivers
Overview
Simply install thePS Plug-in Driver or PCL Driver in Windows.
Port 9100 or IPP can be used for the connection.
- The following settings must be configured before installation.
- Configure the IP address
- When connecting via Port 9100: Configure the port number (default: 9100) for the RAW port being used
- When connecting with IPP/IPPS: Set [IPP Settings] to [ON], or register the certificate in this system.
- Files related to the printer driver are stored in the included Driver CD-ROM.
- For details about the supported operating systems, refer to Windows.
- For details about the IP address setting, refer to [TCP/IP Settings].
- For details about [RAW Port Number], refer to [RAW Port Number].
- For details about [IPP Settings], refer to [IPP Settings].
- For details on the certificate, refer to [PKI Settings].
Procedure (PS Plug-in Driver)
Click either [Allow], [Continue], or [Yes] if the screen related to [User Account Control] is displayed.
The menu screen is displayed.
If autoplay is on, clicking [Select to choose what happens with disk] and then [Run AutoRun.exe] displays the menu screen.
This launches the printer driver installer.
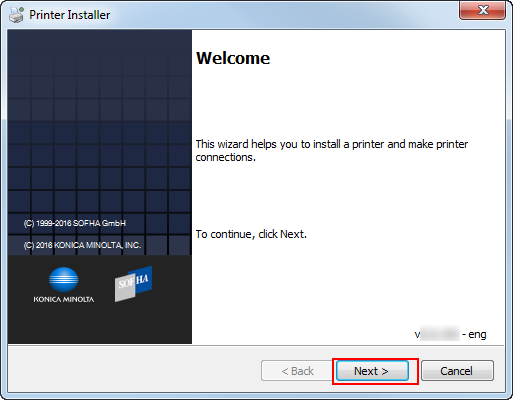

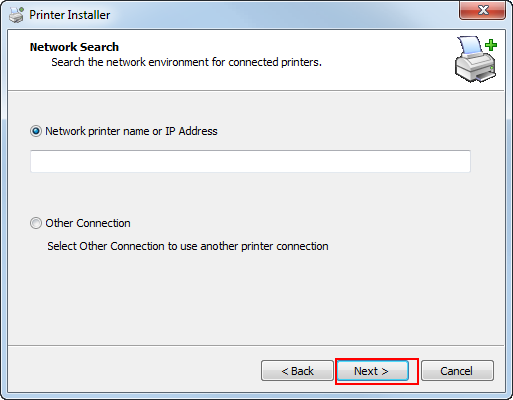
If you select [Network printer name or IP Address], click [Next] and proceed to Step 6.
If connecting to another printer, select [Other Connection] and click [Next].
[Network printer name or IP Address]:
The machine will be configured as a Windows printer.
Printer name will be created using the lpr port (e.g. myprinter:print.).
[Other Connection]:
Configure another printer connection (NetBIOS or Port 9100).

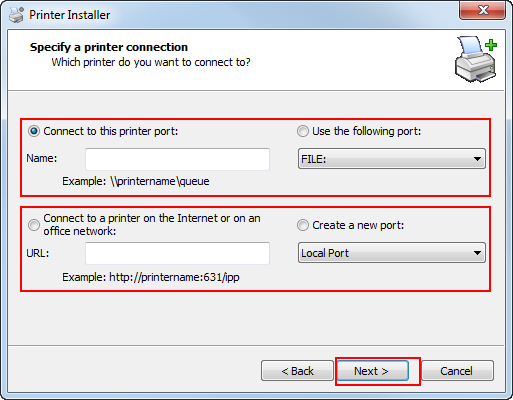
When using DNS over the network, the administrator must check that the network name allocated on the system matches the network name saved on the DNS.

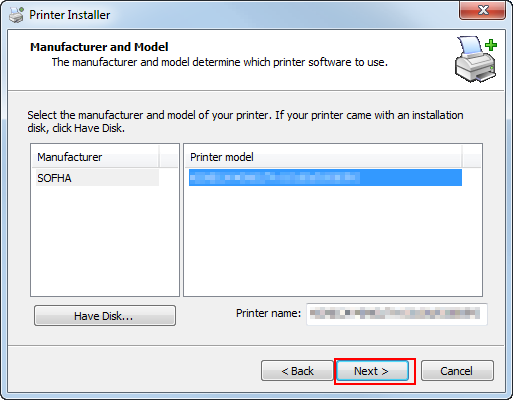
A list of installable printers is displayed. If the printer you want to install is not displayed, click [Have Disk] and select the [Setup.inf] file.

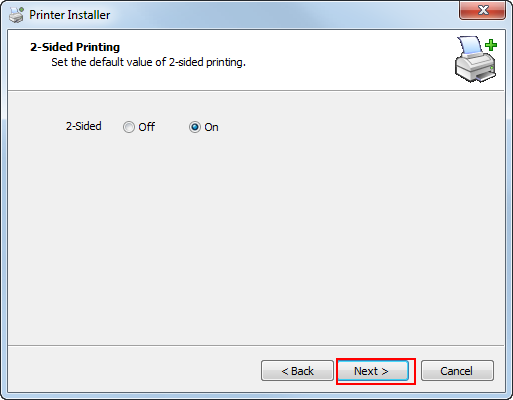

Installation is completed.
When the printer is installed, you are able to select printers from the application print screen.
Procedure (PCL Driver)
Click either [Allow], [Continue], or [Yes] if the screen related to [User Account Control] is displayed.
The menu screen is displayed.
If autoplay is on, clicking [Select to choose what happens with disk] and then [Run AutoRun.exe] displays the menu screen.
This launches the printer driver installer.
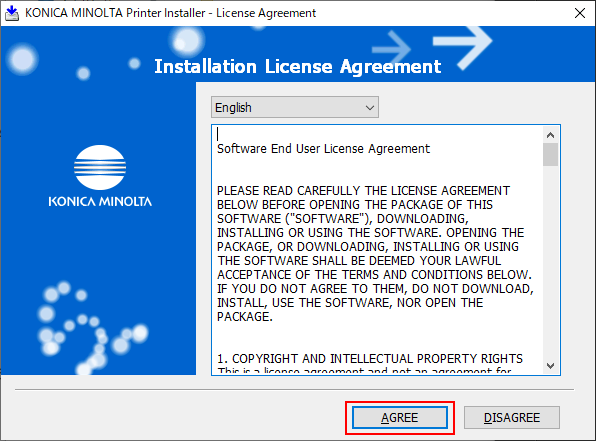
To change the installer's display language, click the menu list in which the language is displayed.

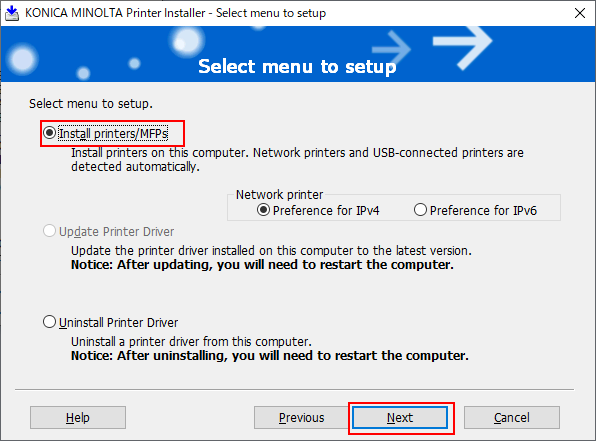
If the target printer is detected in both IPv4 and IPv6, [Preference for IPv4] or [Preference for IPv6] can be selected as the priority address.

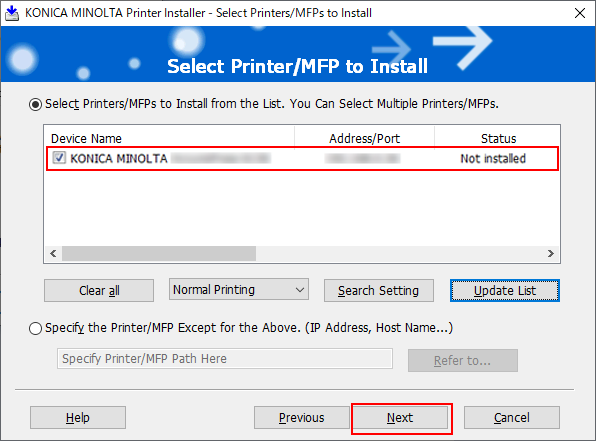
Only printers that are compatible with the printer driver are displayed. If multiple printers are displayed, check with the IP address.
If connection of the target printer cannot be recognized, the printer will not be displayed in the list. Select [Specify the Printer/MFP Except for the Above. (IP Address, Host Name...)], and manually select the desired one.

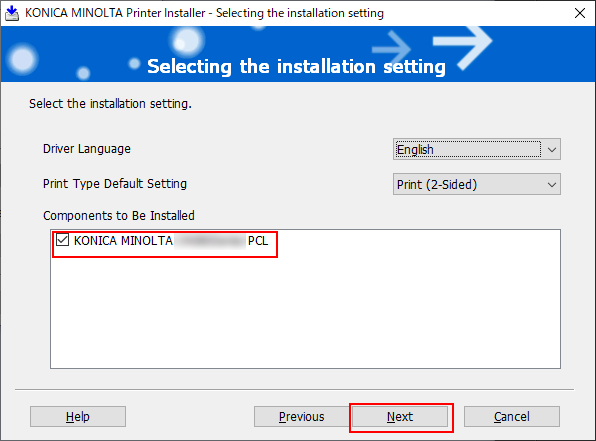

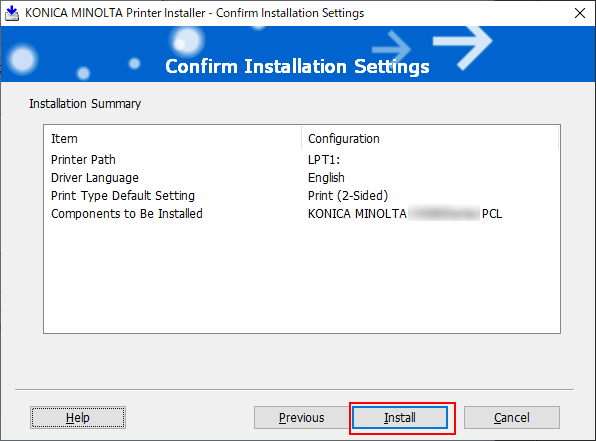
If [Windows Security] is displayed, click [Install].

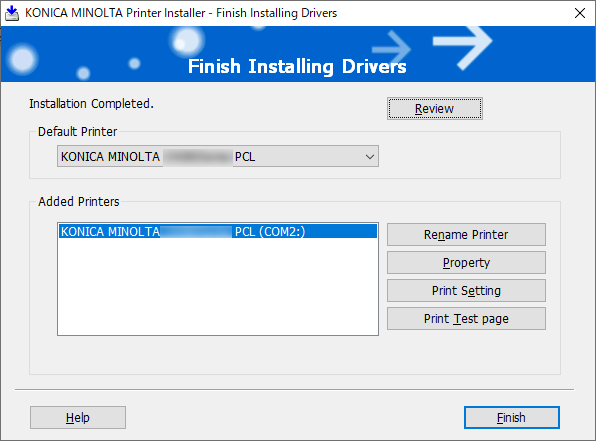
Installation is completed.
To check installation items or change a setting, click the desired one of the following items.
[Review] | Confirm the contents of installation, |
[Rename Printer] | Change the printer name. |
[Property] | Configure the printer's property settings. |
[Print Setting] | Display the [Print Setting] page of the printer driver, and set various functions. |
[Print Test page] | Perform test printing. |


 in the upper-right of a page, it turns into
  and is registered as a bookmark.