Manual Installation of Printer Drivers
Overview
Manually install the PS Plug-in Driver, PPD Driver, or PCL Driver in Windows.
- LPR
- Port 9100
- SMB
- IPP/IPPS
- Web service print
This section describes network connections (Port 9100 printing) which use TCP/IP. For details about other available connection methods, refer to [Network / Security].
- The printer driver and the following settings are required before installation.
- Configure the IP address
- When using Port 9100 printing: Configure the port number (default: 9100) for the RAW port being used
- When using LPR printing: Set [LPD Setting] to [Enable].
- When using SMB printing: Set the print service name in [Print Service Name].
- Files related to the printer driver are stored in the included Driver CD-ROM.
- This section describes the process using Windows 10 as a reference. For details about the supported operating systems, refer to Windows.
- For details about the IP address setting, refer to [TCP/IP Settings].
- For details about [RAW Port Number], refer to [RAW Port Number].
- For details about [LPD Setting], refer to [LPD Setting].
- For details about [Print Service Name], refer to [Print Service Name].
Procedure (Finding and Installing Printers)
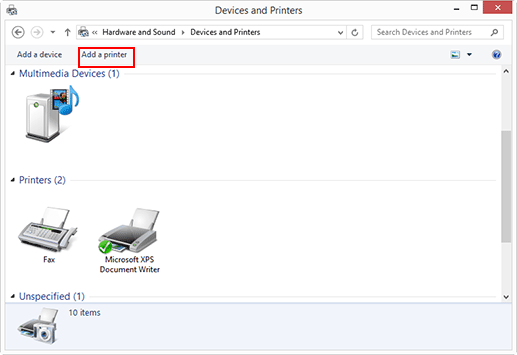
For Windows 8.1, go to [Control Panel] and click [Hardware and Sound] - [Devices and Printers].


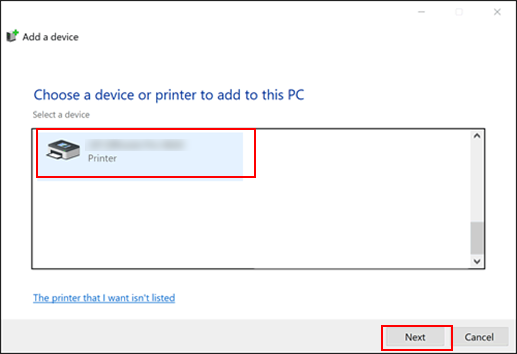
Select the printer with IP address if using an LPR/Port 9100 connection.
Select the "\\NetBIOS Name\Print Service Name" printer if SMB connection is used. The NetBIOS name can be viewed in [SMB Server Settings] of Web Connection. The print service name is set to "print" by default.
For using an SMB connection, click [OK] on the [Connect to Printer] screen which is displayed after clicking [Next].
It may take some time before all printers can be found. If you fail to search for the printer, refer to Procedure (Installation when the Printer is not Found).

Click either [Continue] or [Yes] if the screen related to [User Account Control] is displayed.
Procedure (Installation when the Printer is not Found)
For Windows 8.1, go to [Control Panel] and click [Hardware and Sound] - [Devices and Printers].

The [Add a printer] wizard is displayed.

For LPR/Port 9100 connection, select [Standard TCP/IP Port].
For SMB connection, select [Local Port].
For LPR/Port 9100 connection, select [TCP/IP Device] and enter your IP address.
For SMB connection, enter "\\NetBIOS Name\Print Service Name" into the [Port Name] box. The NetBIOS name can be viewed in [SMB Server Settings] of Web Connection. The print service name is set to "print" by default.
If the [Additional Port Information Required] or [More Port Information Required] screen is displayed, proceed to step 9.
If the [Install the printer driver] screen is displayed, proceed to step 11.
For LPR connection, add a check in [LPR] and enter [Print] into the [Queue Name:] box.
Enter in upper case and lower case accordingly.
To use Port 9100, select the [Raw] check box, and enter the RAW port number ([9100] by default) into the [Port Number] box.
The [Install the printer driver] screen is displayed.
PS Plug-in Driver is stored in [PS] - [PS_Plugin_Driver] - [EN].
PPD Driver is stored in [PS] - [PS_PPD_Driver] - [Windows] - [EN].
PCL Driver is stored in [PCL] - [Drivers] - [PCL] - [EN]. If your computer is 64bit, select [Win_x64]. If it is 32bit, select [Win_x86].
Click either [Continue] or [Yes] if the screen related to [User Account Control] is displayed.


 in the upper-right of a page, it turns into
  and is registered as a bookmark.