
Calibration of Konica Minolta AccurioPress
Introduction
Konica Minolta AccurioPress has various calibration routines that process measurement data. AccurioPro ColorManager is the measurement software designed for this purpose. Therefore, the program has a separate data export for this purpose.
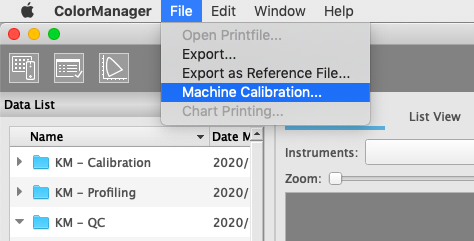
For the calibration of the printer, you usually work with the workflows. Here the export dialog for the machine calibration is automatically called up by the workflow script. If you also want to use the Measure tool for a calibration or if you want to load an old measurement into the machine again, you will find the dialog for exporting machine calibration data under the menu "File -> Machine Calibration".

Select the desired measurement in the Data List window under
- "KM - Calibration/3- Density Balance" or
- "KM - Calibration/4 - Color Density Control"
and open the “Machine Calibration” dialog.


Data Export Settings
Depending on the machine generation, Konica Minolta machines use two file formats for calibration.
„DataExport - Machine Calibration spectral.es“ | all current machines, as of approx. 2014 (bizhub PRESS C1070 and newer) |
“DataExport - Machine Calibration colorimetric.es” | older machines (up to bizhub PRESS C7000/C8000) |
The spectral version is preselected, so that you usually do not have to set it. Both export settings sort the data according to the patch ID specified in the chart definition, so that the printing presses receive the data in the correct order regardless of the measurement sequence.
Network/ Save File
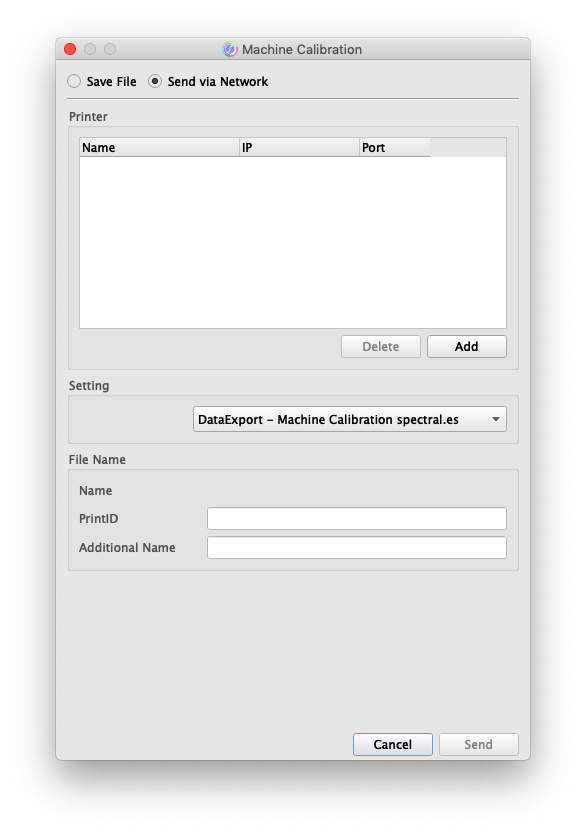
Normally there is a network connection between the computer you use for measurement using this software and AccurioPress. In this case, data transmission via the network is the preferred method. Select your AccurioPress or specify the IP address of AccurioPress to be calibrated. If not changed manually on the machine, the default port is "30091" for IC-6XX, “80” for IC-3XX.
If you have output your calibration prints with a QR code and measure with the MYIRO-9(FD-9), the IP address is automatically taken over by the QR code.
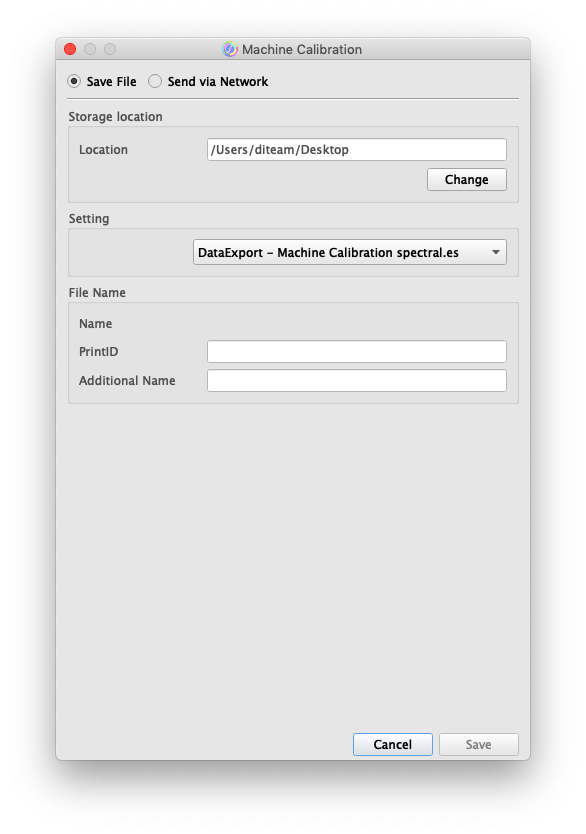
If there is no network connection, you can also store the calibration measurements on a USB stick and feed them into the machine via the USB interface.
To enable the machine to automatically recognize the measurement data, please create a suitable subfolder “Model name”, "ADJUST_DATA" on your USB stick, in which you store the calibration measurement data.
E.g. D:\C3080\ADJUST_DATA
File Name
Calibration prints often consist of several pages. AccurioPro ColorManager combines all pages required for a calibration in one measurement to simplify operation and data archiving.
When sending the measurement data to the printer, the “Print ID” (Density Balance and Color Density Control) and the “Additional Name” (for Density Balance only) are required for each page.
If you have output your calibration prints with a QR code and are measuring with the MYIRO-9(FD-9), the “Print ID” is automatically taken from the QR code.
To avoid errors, the Send/Save button is inactive if entries for sending the calibration measurement data are still missing. As soon as you have filled in the necessary information for all pages, you can send the calibration data or save them on your USB stick.
After you have transferred the data to AccurioPress, you must activate them on the control panel of AccurioPress.
 in the upper-right of a page, it turns into
  and is registered as a bookmark.