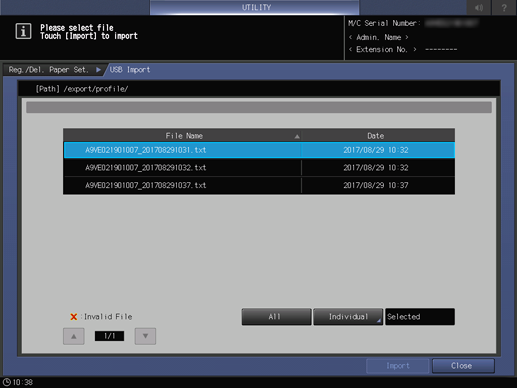
[Import]
Overview
Import the paper profile exported from another machine of the same model to this system.
- Before using this function, connect the USB flash drive containing the target paper profile to this system.
- For details about how to export a paper profile, refer to [USB Flash Drive] - [Export].
Specifications
Category | Print Workflow, Copy / Scan | ||
Location | Machine | Control Panel | |
Printer driver | - | ||
Application | - | ||
Required options | - | ||
Required items | USB flash drive | ||
Setting items | [+] / [,] | Switches the target page. | |
[All] | Collectively imports all the paper profiles stored on the USB flash drive to this system. All the paper profiles stored on the USB flash drive overwrite the paper profiles on this system. | ||
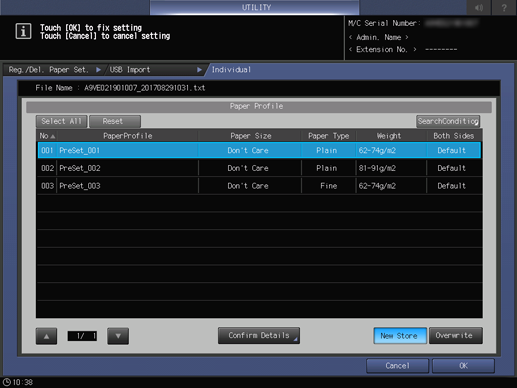
[Individual] | Selects the paper profile you want to import from the paper profiles stored on the USB flash drive, and imports it to this system. Selecting New Store allows you to import up to 500 paper profiles together with the number of data items registered to this system (the number of paper profiles that can be imported is calculated by subtracting the number of registered paper profiles from 500). Selecting Overwrite allows you to import up to 500 paper profiles. | ||
[Import] | Imports the paper profile. | ||
Remarks | - | ||
Reference | - | ||
Screen access | Control panel - Utility/Counter - [User Setting] - [System Setting] - [Paper Tray Setting] - [Paper Setting] - [Paper Profile Setting] - [USB Flash Drive] - [Import] | ||
Control panel - Utility/Counter - [User Setting] - [USB Profile Import] - [Paper Profile Setting] - [USB Flash Drive] - [Import] | |||
Procedure (For All)

"


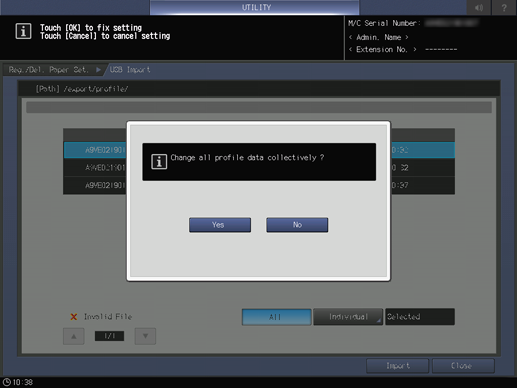
When the confirmation dialog box is displayed, press [Yes].

Procedure (For Individual)

The [Individual] screen is displayed.
"


To select all data, press [Select All]. To reset all the selections, press [Reset].
To confirm the details of the selected data, press [Confirm Details].
You can also press [SearchCondition] to set conditions and narrow down paper profiles. For details, refer to [SearchCondition].

This returns to the [USB Import] screen.

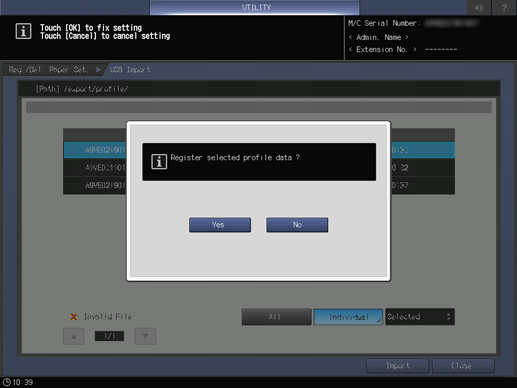
When the confirmation dialog box is displayed, press [Yes].
The confirmation message is different for [New Store] and [Overwrite].


 in the upper-right of a page, it turns into
  and is registered as a bookmark.