
Making Micro-Adjustments to Backside
Overview
A useful adjustment feature for adjusting the image position and magnification of the backside image based on the output results of the actual job data.
Procedure
Output 3 copies of the job data that will actually be used from the tray to which "Both Sides Adjustment" has been carried out.
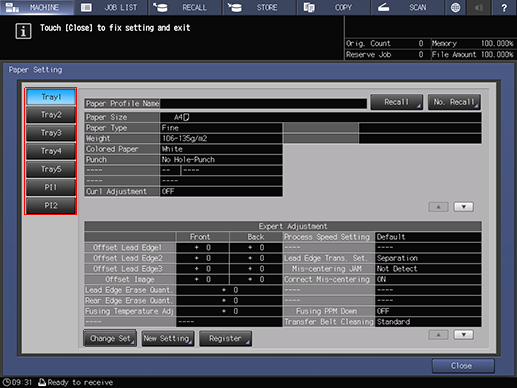
Press [Paper Setting] on the [MACHINE] screen, select the tray from which the job data was output, and press [Change Set].
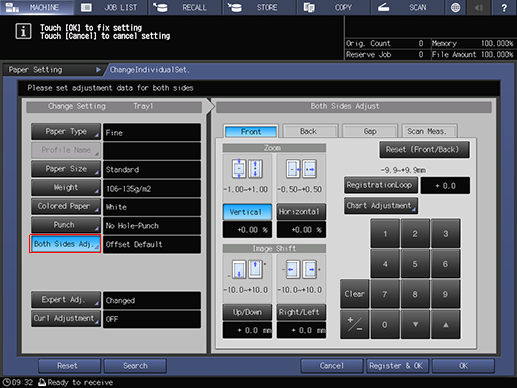
Press [Both Sides Adj.].
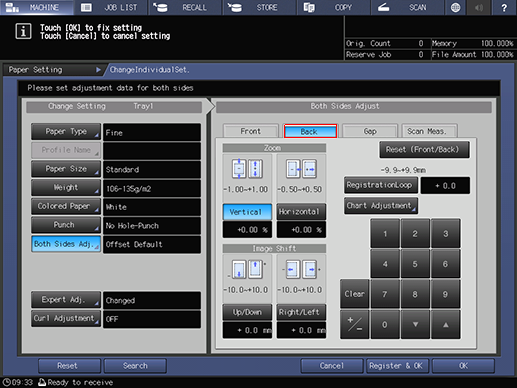
Press [Back].
Check for the deviation in the magnification of the back side from the backside image in the 2nd and 3rd sheet outputs among the jobs output in Step 1.
Place the paper so that the front side of 1 sheet (the 2nd output sheet) is facing up and the back side of 1 more sheet (the 3rd output sheet) is facing up, and then compare the spacing of the images on the front and back sides. When reversing the paper, flip the paper using the cross direction as the axis of rotation.
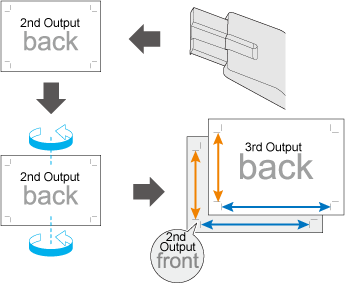
If the spacing on the front side and back side images are inconsistent, enter the adjustment values into [Vertical] (cross direction) and [Horizontal] (feed direction).
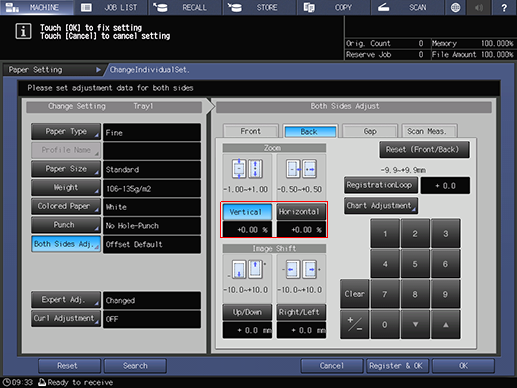
The adjustment values change in 0.01% increments per step.
Adjustment Range: [Vertical] -1.00 to +1.00, [Horizontal]: -0.50 to +0.50
Image Magnification Adjustment Example: Enter -0.25% as the adjustment value when the spacing of the front side image is 400 mm and the spacing of the backside image is 401 mm.
Press [OK] when the adjustments are complete.
Output 3 copies of the same job data as that used in Step 1 from the same tray.
Check for deviation in the image magnification of the back side on the 2nd sheet and 3rd sheet of the output paper. Repeat Steps 5 through 7 until there are no deviations in the image magnification.

Press [Paper Setting] on the [MACHINE] screen, select the tray loaded with the paper you want to perform the adjustments with, and then press [Change Set].

Press [Both Sides Adj.].
Check for the deviation in the back side position from the backside image in the 2nd and 3rd sheet outputs among the jobs output after magnification adjustment.
The black lines in the illustration represent the back side while the blue dotted lines represents the front side. If the positions of the front and back side images are inconsistent, enter the adjustment values into [Up/Down] (cross direction) and [Right/Left] (feed direction). When moving the image up or to the right, use positive (+) values. When moving the image downward or to the left, use negative (-) values. Image Position Adjustment Example: If the image on the back side with regards to the image on the front side deviates by 0.5 mm down and 0.3 mm to the right, enter +0.5 mm into [Up/Down] and -0.3 mm into [Right/Left].
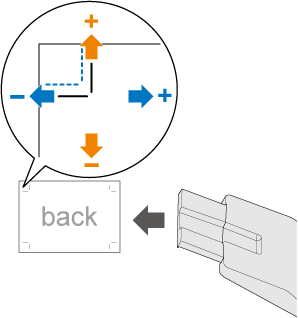
The adjustment values change in 0.1 mm increments per step. Adjustment Range: [Up/Down] -10.0 to +10.0, [Right/Left]: -3.0 to +3.0
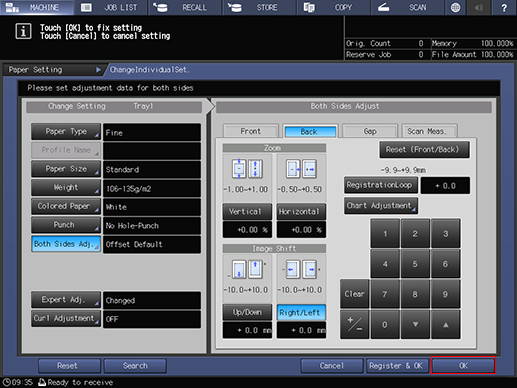
Press [OK] when the adjustments are complete.
Output 3 copies of the same job data as that used in Step 1 from the same tray.
Check for deviation in the image positions of the back side on the 2nd sheet and 3rd sheet of the output paper.
Repeat Steps 11 through 13 until there are no deviations in the image positions. The adjustment process is complete when there are no deviations in the image positions.
 in the upper-right of a page, it turns into
  and is registered as a bookmark.