Account Track Registration: Adding, Changing, and Deleting Account Track Registrations
Use this function to assign a number to each account, and set Account Name, Password, Max. Allowance Set, and Function Permission for each account number.
The registered account is listed on the screen. This list enables you to select an account to change the data as desired, or to delete that account.
Follow the procedure on Administrator Setting to display the [Administrator Setting Menu] screen.
Press [User Auth./Account Track] on the [Administrator Setting Menu] screen, and then press [Account Track Settings] and [Account Track Registration] in sequence.
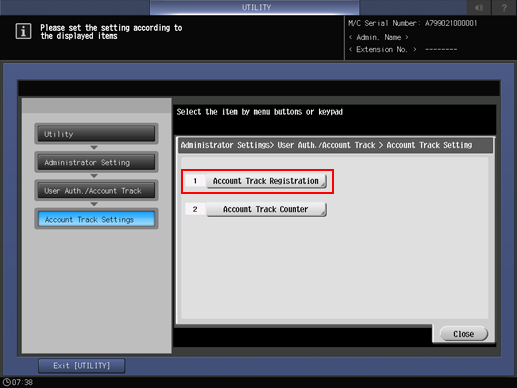
The [Account Track Registration] screen is displayed.
Follow the instructions below to add, change or delete the account data.
Select the unregistered Account No. button, and press [Edit].
Press [Account Name] and [Password] to specify the account name and password.
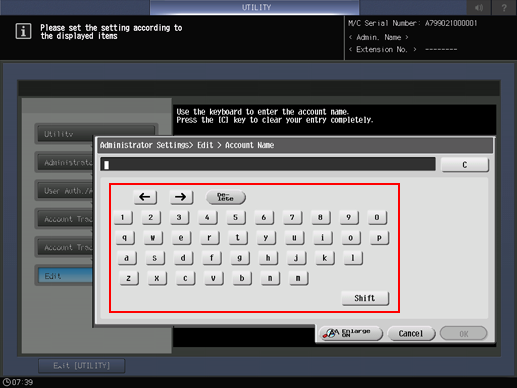
Press [Account Name] to display the [Account Name] screen. Enter the desired account name. You can enter up to 8 one-byte characters for the account name.
Press [Password] to display the [Password] screen. Enter any desired password. Press [Password Input Confirmation], enter the same password again, and press [OK]. You can enter up to 8 one-byte characters for the password.
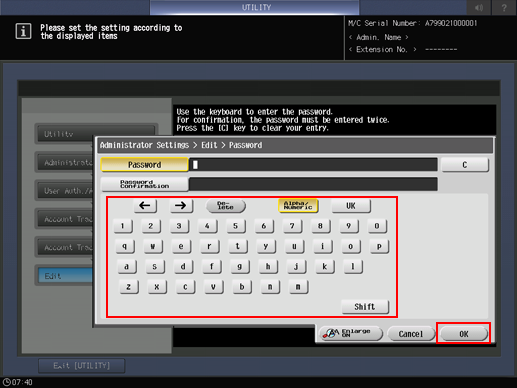
Press [OK] on each screen to complete the setting.
Press [Max. Allowance Set] to set the value.
Press [Max. Allowance Set] to display the [Max. Allowance Set] screen. Enter the maximum limit from the keypad. If you press [Cancel], the value is reset and the Maximum Allowance is not set. Select [Package Change] to apply the current settings to all account numbers.
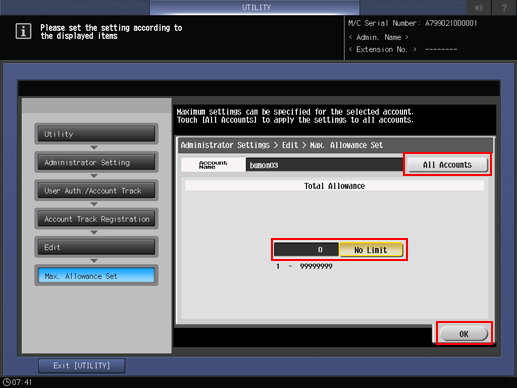
Press [OK] to complete the setting.
Select [Function Permission].
[Copy], [Scan], [Print], [Store Document] Press [Allow] or [Restrict] at right and select a function to be enabled to account numbers. Select [Package Change] to apply the current settings to all account numbers.
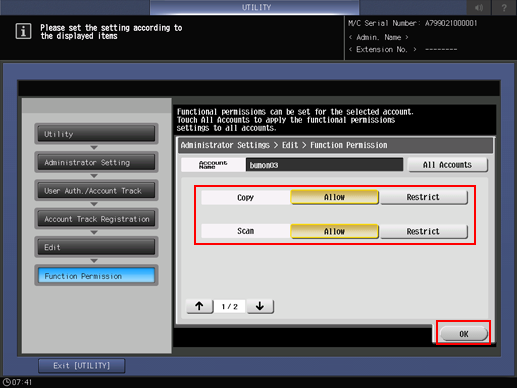
Press [OK] to complete the setting.
Change account data.
Select the account name to be changed, then press [Edit].
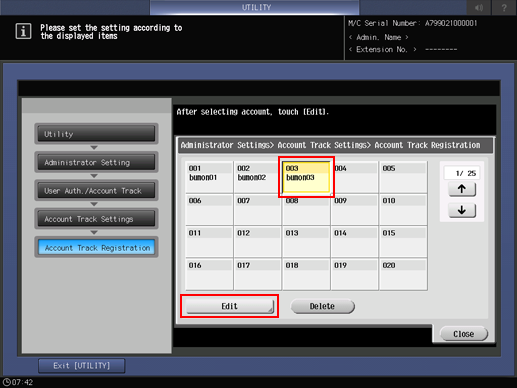
Setting options provided on the screen and setting method are the same as those of adding account data, described in step 3.
When finished with making the desired changes, press [OK].
Delete account data.
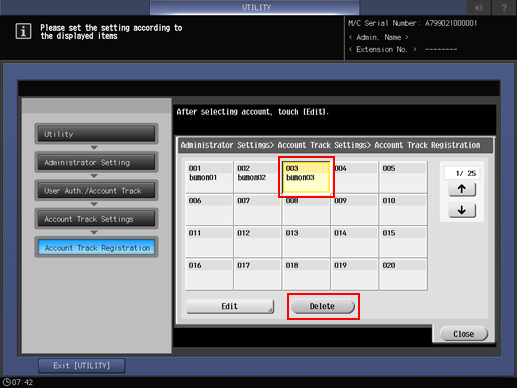
Select the account name to be deleted, then press [Delete].
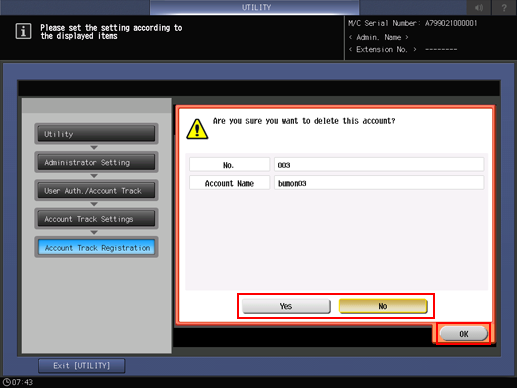
Press [Yes] on the confirmation dialog to delete it, and press [OK] to complete the setting. Or, press [No] to cancel.
Press [Close].
The screen returns to the [Account Track Settings] screen.
