
Punch Vertical Position Adj.: Adjusting the Vertical Position of Punch Holes
Adjust the vertical position of punch holes made by Folding Unit FD-503. Adjust the distance between punch holes and paper edge.
Objects of Adjustment:
2-Hole: Offset for All Size, A3  , B4 , SRA4 , A4 , B5 , A4
  , A5 , B5 , A5 , 12
  18 , 11 17 , 8.5 14 , 8.5 11 , 8.5 11 , 8.125 13.25 , 8.5 13 , 8.25 13 , 8 13 , 8K , 16K , 16K , 9 11
3 Hole / 4 Hole: Offset for All Size, A3 , B4 , SRA4 , A4 , B5 , 12 18 , 11 17 , 8.5 11 , 8K , 16K , 9 11

If a numeric value is specified for [Offset for All Size], it is applied to all paper sizes. With a specific paper size selected,the set value becomes the sum of the entered value and the value previously specified for [Offset for All Size].
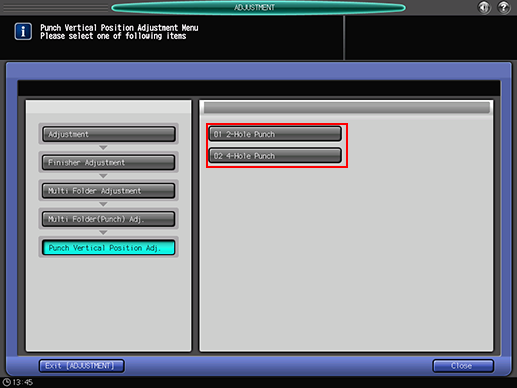
Press [Adjustment] on the [MACHINE] screen to display the [Adjustment Menu] screen.
Press [Finisher Adjustment], [Multi Folder Adjustment], [Multi Folder (Punch) Adj.], and [Punch Vertical Position Adj.] in sequence.
Select [2-Hole Punch], [3-Hole Punch], or [4-Hole Punch].
The number of punch holes varies depending on the country/region in which the machine is used.
Select the size to be adjusted using [
 ] or [
 ].
]. 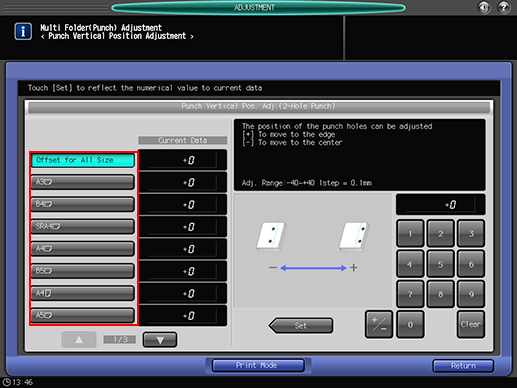
Press [Print Mode].
Load the paper with the size to be adjusted, then select that tray.
Press Start on the control panel.
A sample pattern will be output.
Measure the distance (a) from the edge of the printed paper to the center of punch holes.
Number of punch holes
Allowance
2 holes /4 holes
10.5 mm ± 4.0 mm or more
3 holes
9.5 mm ± 4.0 mm or more

If any adjustment is required, press [Exit PrintMode] to return to the [Punch Vertical Position Adjustment] screen.
Use the touch panel keypad to enter the set value.
Use [+/-] to specify the value to be positive or negative.
Press [Set] to change the current value.
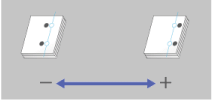
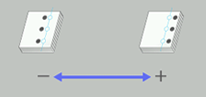
Adjustment Range: -40 ([To move to the center]) to +40 ([To move to the edge]) (1 step = 0.1 mm)
2-Hole
3-Hole
4-Hole

Repeat steps 5 to 10 until the desired result is obtained.
Press [Return].
The screen returns to the [Punch Vertical Position Adjustment Menu] screen.