Replenishing Large Capacity Unit LU-411 with Paper
To use paper other than currently loaded in the large capacity tray, change the setting of the large capacity tray in [Paper Setting] from the [MACHINE] screen or [COPY] screen.
Open the tray top door.
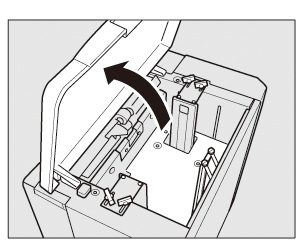
The bottom plate automatically goes down.

Without the main body power turned on, the tray bottom plate does not move down. Be sure to turn the sub power switch ON.
To load the same size as loaded before, proceed to step 4.
To load a different size of paper, proceed to step 2.
Adjust the position of side guide plate.
Open the tray left side door, and turn the side guide fixing knob (lower) counterclockwise to remove it.
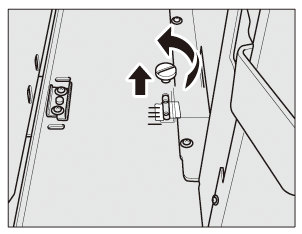
Turn the four side guide fixing knobs (upper) of the side guide plate counterclockwise to loosen them.
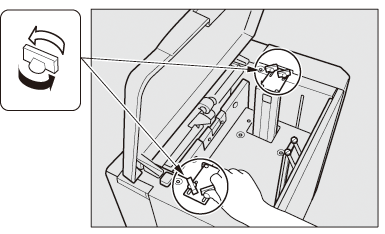
Move the two side guide plate to an appropriate position according to the size indication provided on the top of the guide plates.
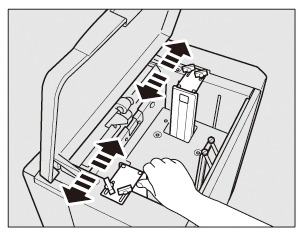
Turn the side guide fixing knobs (upper) (2 pieces for each) of the side guide plate clockwise to fix the guides.
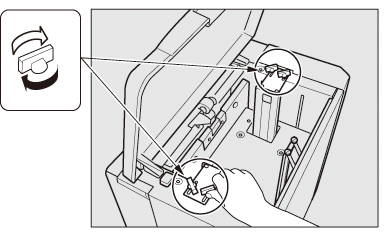
Adjust the front side edge of the side guide bottom fixing plate to the desired size indication.
Fit the side guide fixing knob (lower) to the threaded hole, then turn the knob clockwise to fix it.
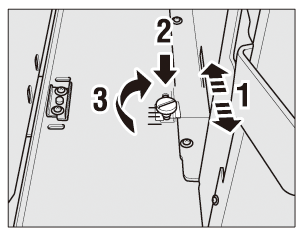

The threaded hole that has been used before may be unavailable for the new position of side guides. In this case, find another threaded hole to fix the knob.
Close the tray left side door.
Adjust the position of the rear guide plate.
Turn the two rear guide fixing knobs of the rear guide plate counterclockwise to loosen them.
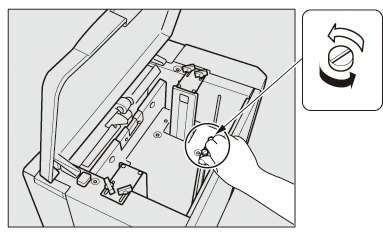
Move the rear guide plate to an appropriate position according to the size indication provided on the tray bottom plate.
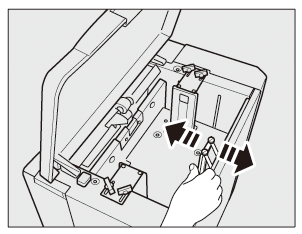
Turn the two rear guide fixing knobs of the rear guide plate clockwise to fix them.
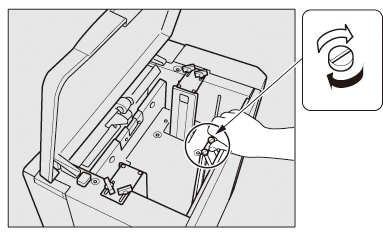
Load paper with the print side up.
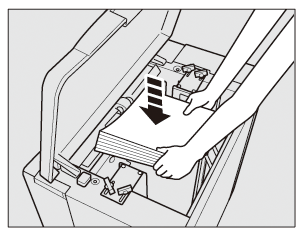
Press the bottom plate lowering button.
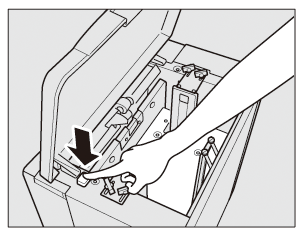

Without the main body power turned on, the bottom plate lowering button will not function. Be sure to turn the sub power switch ON.
Repeat the steps 4 and 5 until the tray bottom plate will not go down any more.
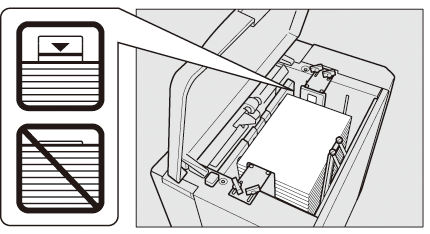

Do not load above the limit level indicated on the side guide plate of the tray.
Be sure that the rear guide plate is securely aligned with the loaded paper. If making the space between the rear guide plate and paper too wide or too narrow, paper jams or machine trouble may be caused.
Close the tray top door.
The paper level indicator of the tray changes from "
 " to "
  " on the [MACHINE] screen and [COPY] screen.
