Image Quality: Changing the Contrast (Tone Curve)
Select a tone curve in the printer driver, and then print.
• Function Introduced in This Section
Tone Curve is a function to adjust brightness and contrast by controlling the input-output density curve for each of CMYK colors.
Once tone curves adjusted in various conditions are registered in the image controller, those registered tone curves can be called and applied at the time of printing.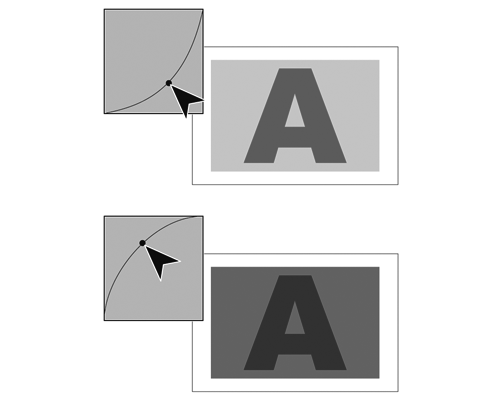
Using Color Centro allows tone curve adjustment and registration to the image controller. (Refer to Image Quality: Adjusting the Tone Curve.)
•Intended Environment
Operating system | Windows 7 |
Application | Adobe Acrobat XI Pro |
Printer driver | PS Plug-in Driver |
Image Controller | Built-in image controller |
* The sample screen may be different from the actual display depending on your system environment and application version/revision.
•Workflow
STEP 1: Setting printer driver
•Related Section
Setting printer driver
Call a tone curve registered to the image controller and then set it for the printer.
Open the original data with the application, and then click [Print] on the [File] menu.
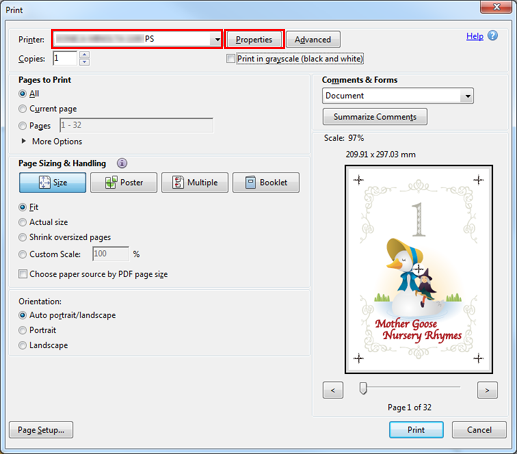
Select the printer to use for printing and click [Properties].
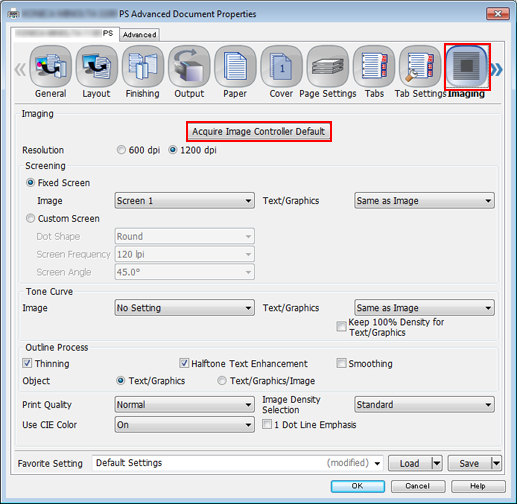
Click the [Imaging] tab, and then click [Acquire Image Controller default].
When image controller information is acquired, a green checkmark is displayed.
If image controller information could not be acquired, a red x mark is displayed.
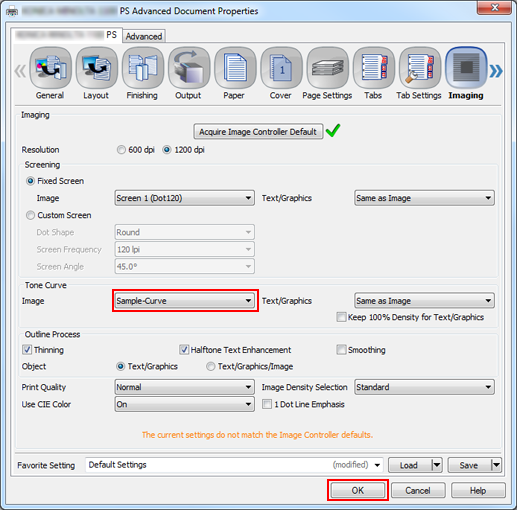
Under [Tone Curve], select the tone curve you wish to apply and click [OK].
You can set a tone curve for [Image] and [Text/Graphics] separately.
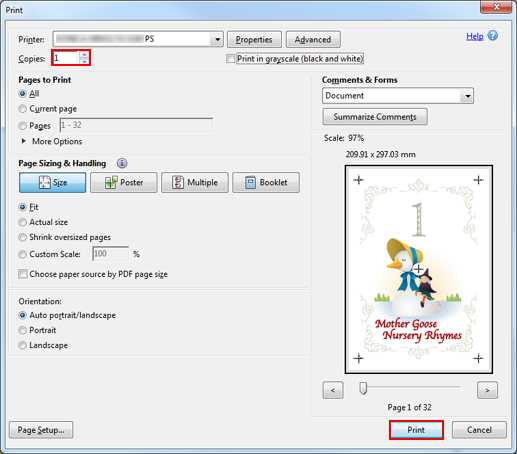
On the [Print] screen, enter the [Copies] and click [Print].
The document is printed based on the called tone curve.

