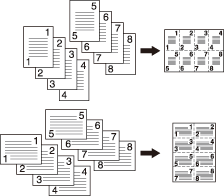
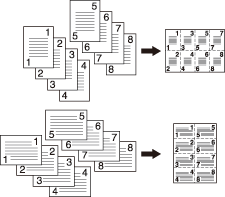
Combine: Copying Fixed Number of Pages onto One Sheet
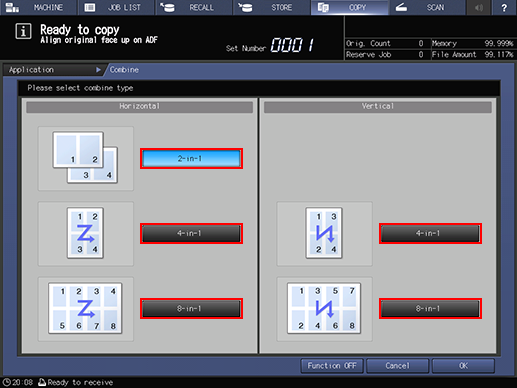
Use this function to lay out and copy a fixed number (2, 4, or 8) of pages onto one sheet of copy paper, so that the paper use can be saved. The following options are provided to [Combine]. The starting position to combine depends on configuration of [Direction].
Setting options | Description |
|---|---|
[2-in-1] | Prints 2 original images onto one sheet. - Horizontal order |
[4-in-1] | Prints 4 original images onto one sheet. The page arrangement (numbering direction) can be specified. - Horizontal order |
[4-in-1] | - Vertical order |
[8-in-1] | Prints 8 original images onto one sheet. The page arrangement (numbering direction) can be specified. - Horizontal order |
[8-in-1] | - Vertical order |
Use ADF.
If the original is placed on the original glass, [Separate Scan] mode functions automatically.
[Auto Zoom] is automatically selected. Zooming is automatically selected according to the paper size set in tray 1. (Setting can be changed manually.)
Position the original.
Select [Direction] according to that of the original placed.
Original Direction
Key
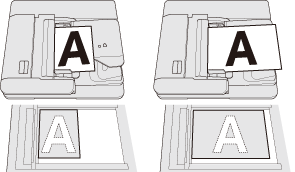
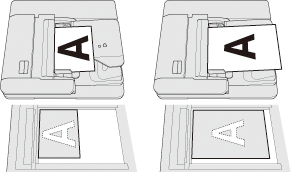

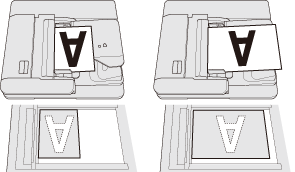

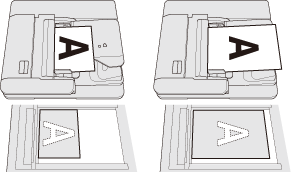

Press [Application] on the [COPY] screen.
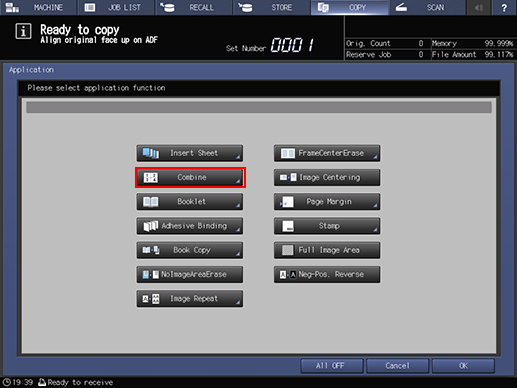
Press [Combine] on the [Application] screen.
Select the desired mode.
Select one of the 5 keys, referring to the illustrations on previous pages.
Press [OK] to complete the setting.
To resume the original settings, press [Cancel].
To cancel the Combine function with the current setting saved, press [Function OFF].
Press [OK] on the [Application] screen to return to the [COPY] screen.
The [Combine] icon and shortcut key are displayed under [Application] on the [COPY] screen.
[Auto Zoom] is automatically selected. When selecting any tray other than the one that is set and displayed on the COPY screen, press the desired tray key.
Enter the desired print quantity from the keypad on the control panel.
Press Start on the control panel.
Printing does not start without returning to the [COPY] screen. Be sure to display the [COPY] screen.


