Printing an overlay
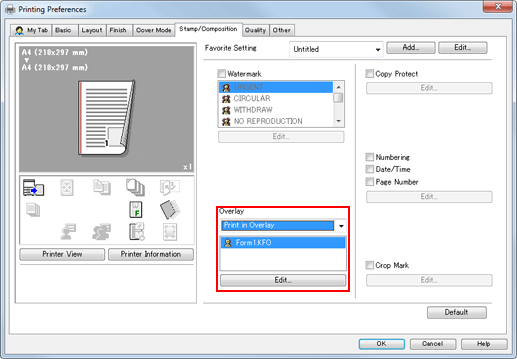
In [Overlay] of the [Stamp/Composition] tab, select [Print in Overlay], then select the overlay to be superimposed on a document for printing, from the list.

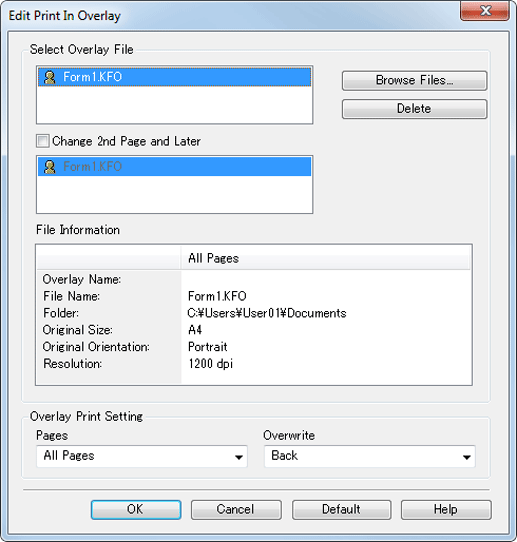
If necessary, click [Edit...] to add or delete an overlay. Also, change the method to superimpose an overlay onto a document.

Setting
Description
[Select Overlay File]
Adds or deletes an overlay.
[Browse Files...]
Adds an overlay to the list.
[Delete]
Deletes the selected overlay from the list.
[Change 2nd Page and Later]
Select this check box to change the overlay to be superimposed on the second page and subsequent pages of the document. Also, select the overlay to be changed from the list.
[File Information]
Displays the information on the overlay selected in list.
[Overlay Printing Setting]
If necessary, change the method to superimpose an overlay onto a document.
[Pages]
Select the range of pages to superimpose an overlay onto.
[Overwrite]
Select whether to overwrite an overlay on the front or back side of the document.
Click [OK] to start printing.
The print job is output, and counted to the specified user.
